My Links

Showing posts with label tutorial. Show all posts

Thursday, December 1, 2011

How To Make A Snow Globe


Pretty much anything around the house that is clear and can be sealed is able to be a snow globe. Mason jars are a common option, but I personally like to reuse salt and pepper (or other spice) shakers. Depending on the size of your globe, these can be used for just about anything, including christmas presents. Small ones can even be used as ornaments; just attach a ribbon or sturdy string to the top in a hoop.

My own globes will be listed for sale on my website.

Salt Shaker Snow Globe
What you will need:

  • a salt shaker with the lid
  • cotton stuffing
  • something to put inside (I used a doll charm I made out of poly clay)
  • glitter
  • a hot glue gun and glue sticks
  • decorations (ribbon, cloth to cover the lid, etc)
Step 1.  Carefully squeeze a generous amount of glue into the shaker. Make sure it only touches the bottom. Drop a chunk of cotton in and use a stick or pencil to stuff it down. If the stick gets stuck, carefully use another one to pry the material off before pulling it out. Let dry.

Step 2.  Add more glue on top of the cotton, then add your charm. Using tweezers can help you to position it. Let dry.

Step 3.  Fill with water, then add a decent amount of glitter.

Step 4.  Squeeze a good amount of glue into the inside of your shaker cap, making sure it fills the little holes. Then coat the insides of the shaker with glue and quickly screw or press it firmly onto the top of the shaker. Let dry.

Step 5.  Turn the shaker upside-down to check if water leaks. If it does, fill the leaking spots with glue to seal it.

Step 6.  Decorate your globe as you wish!


How To Make A Paper Star - Crafts

Last night I was looking over some ideas in various online magazines and came across a basic paper star craft idea. It inspired me to make my own, so I've decided to post a couple of my paper star craft ideas. The first one was mostly for an experiment. I really wanted a reason to cover newsprint cutouts of stars in glitter and since I love sleeping 'under the stars', I thought an elegant, simple mobile would add a nice touch. You can add a lot of stars or extra detail if you like, but I opted for something modest with mine. I do not suggest using these for baby beds because the glitter could fall off in bits and land in a baby's eyes.

These mobiles could also easily be used to make chimes if you have weatherproof material. Even random seashells or pieces of driftwood rather than stars would sound and look beautiful. I have seashells all over my own house, and they're very useful for various crafts.

First, if you wish to learn how to make a paper star, you can do so here. There are a lot of options for different sorts of stars you can make. Once you have your stars cut out (I just used a bunch of newspaper and ads I receive in the mail) you can follow the tutorial below, or one of the other tutorials I will be listing next.

Stars Mobile
What you will need:

  • paper stars
  • glitter
  • craft glue
  • hot glue or strong tape
  • string/ribbon
  • decorations
  • wire or something that can hold the stars (a bent coat hanger, etc)
  • a thumbtack


  1. Take your stars and coat one side in glue. Then cover this with a thick layer of glitter. I mixed some glitter to make different shades. Let dry.


2.   Get your wire and bend it to a circle. You can also use a paper plate or some sort of similar circle. Decorate this as you wish, then hot glue or firmly tape strings of different length to it. One string for each star. 


3.   Hot glue or firmly tape the tip of each star to each string. Make sure the stars are far enough apart that they don't bump into each other when hanging. 

4.   Add as much decoration as you want. I used a ribbon to hang my wire, and put a cluster of feathers hot glued to a ribbon in the center of the piece. 

5.   Hang it wherever you please. Mine is going above my bed.


Tuesday, May 3, 2011

Tutorial on How to Make a Cloth Strawberry


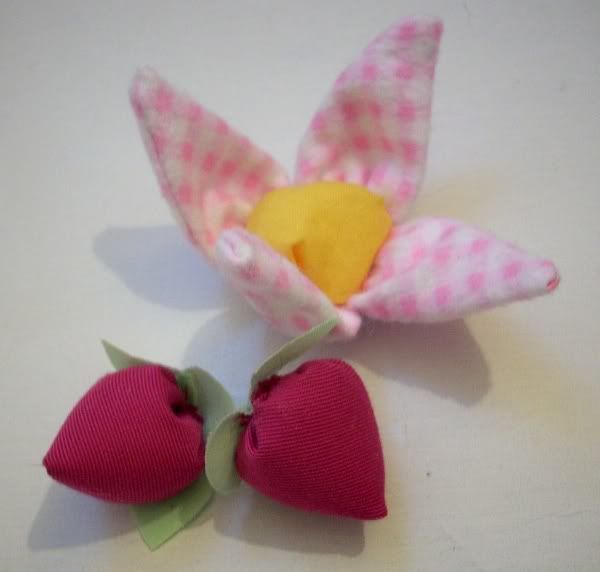
Here's a little tutorial on how to make a cloth strawberry. You can opt to make a flower instead by not stuffing the strawberry and using it as a 'petal'. Four to six petals sewn together make a very adorable flower. My flower has a cotton filled center so that it can be used as a pincushion. I do not suggest making a felt strawberry as felt tends to be a bit too thick. Something thin like cotton (in fact, I always make cotton strawberries) is much better.

On with the tutorial!


Step 1: Draw and cut out a circle from your fabric. Fold this in half and then cut along the crease so that you have two halves.


Step 2: Fold one of the halves in half, so that you have a quarter of a circle, with the face of the fabric on the inside. Sew along the straight edge, leaving the curved edge open.


Step 3: Turn it inside-out. The face of the fabric should be showing (mine is the same on both sides). Now run a small, relatively tight gathering stitch along the open edge, and do not tie it off as we will do this after stuffing. You will already see your strawberry taking shape!


Step 4: Stuff the strawberry with cotton. You can also use very finely cut up bits of fabric if you don't have any cotton. Just make sure it's well shredded. If you are making the flower, skip this step.


Step 5: Pull the gathering thread tight, this should seal up your strawberry. Stitch it securely so that it doesn't come open.


Optional step 6: Make some leaves to add to the bottom of your strawberry. If you are making the flower, just connect these petals (unstuffed strawberries) together and place something in the middle. I used a little stuffed ball of yellow cotton.


And you're done!

Be sure to leave comments, I'd love to see any ideas and finished projects involving this!

Monday, May 2, 2011

Cupcake / Teacup Pincushion Tutorial


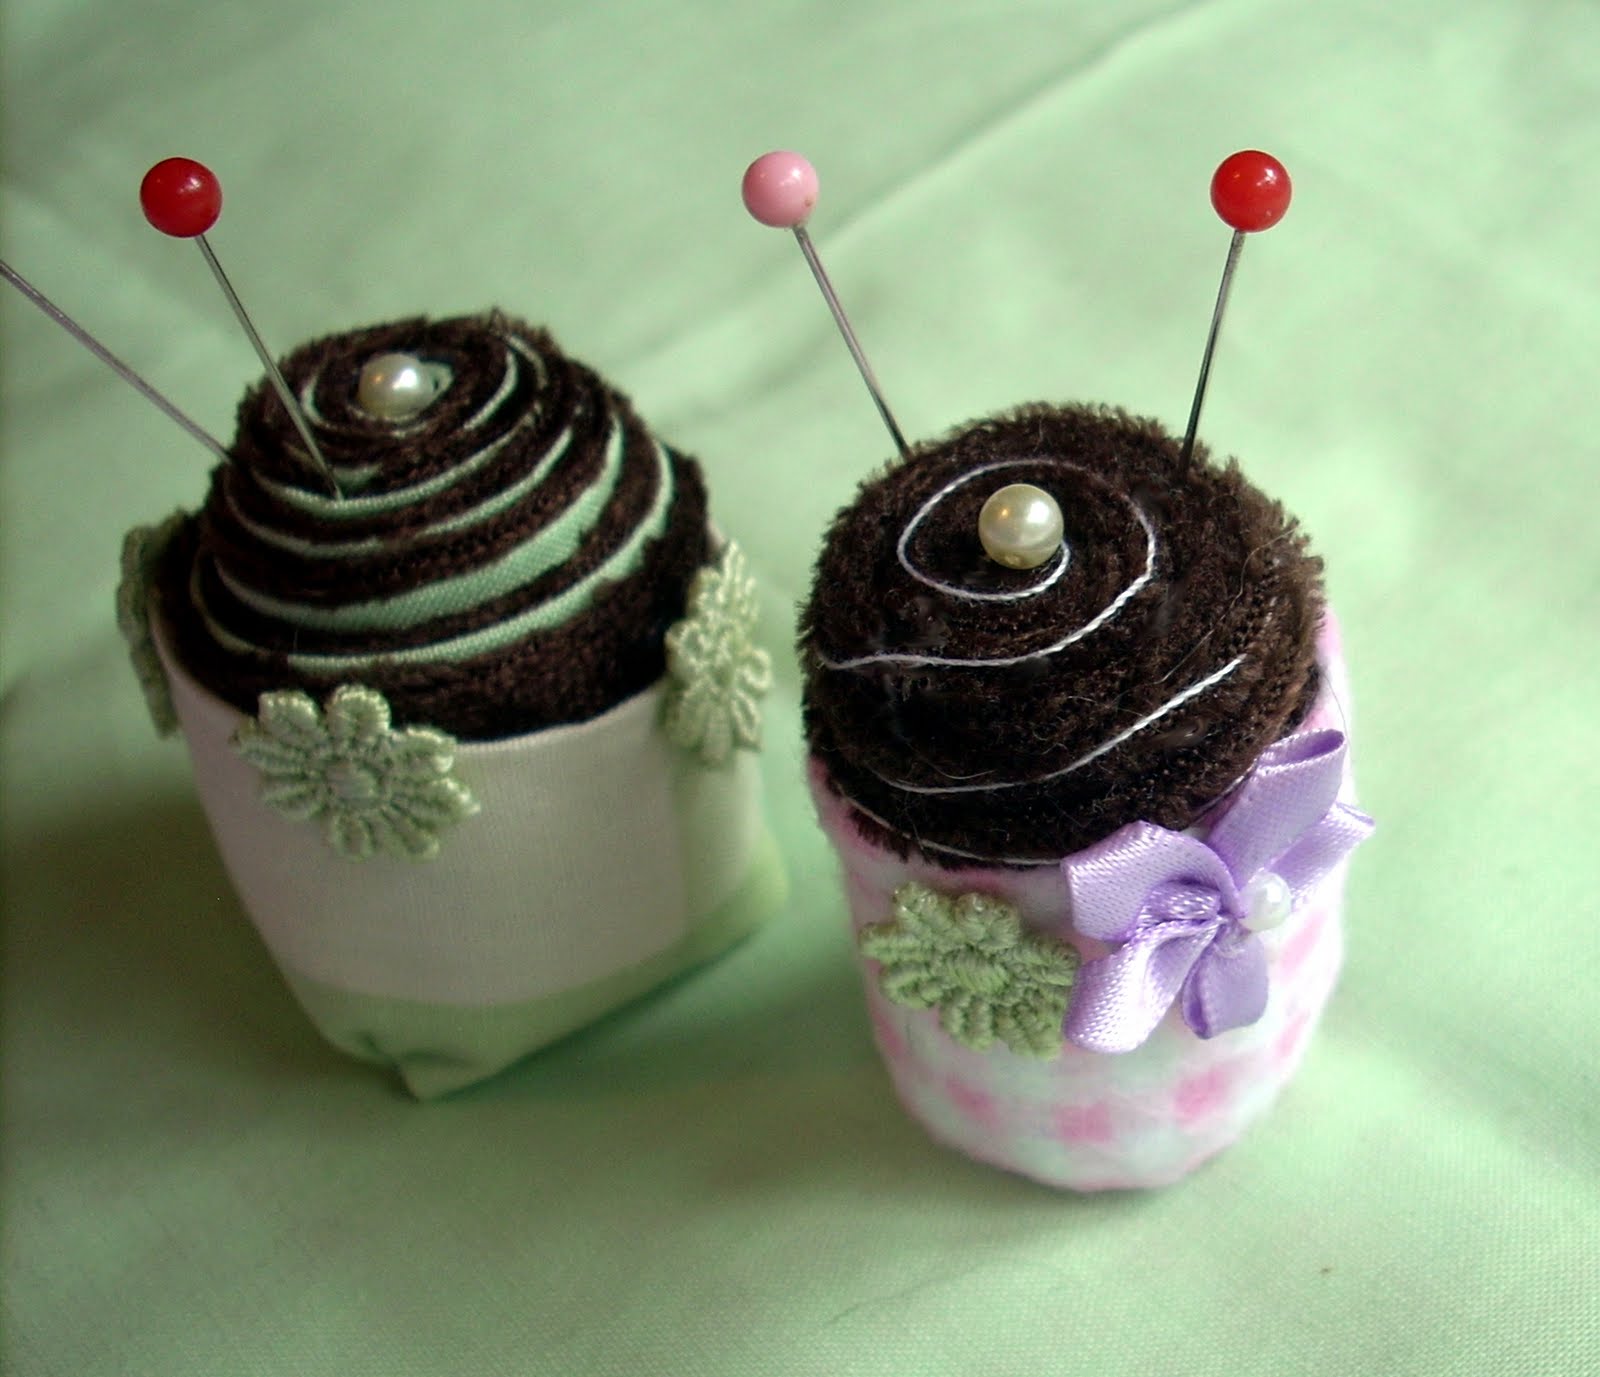
Thought I'd make a tutorial on how to make adorable cupcake pincushions. These are roughly 1.5 to 2 inches tall and about an inch across, or 4 inches in diameter. They are very easy, not at all time consuming, and take very little material. I made my own from scraps.
These little cupcakes make great gifts, especially passed out at Lolita meet-ups!

Step 1: Choose your material. You will need at least two; one for your cake and one for your cupcake wrapper. The one for your cake must be plush, or you will end up using a good amount of material. I am using some leftover brown velvet for my 'chocolate'. It is perfectly plush. You can probably get away with a thick cotton, but velvet, felt, or even wool would be better. Make sure it is something that can handle a whole lot of needles without being ruined. The second fabric (for the wrapper) must be something more thin, such as basic cotton, which is what I've used.
** You can also opt for a third color if you wish to make a swirly cupcake. I have used a mint-green cotton for this in my tutorial.


Step 2:  Cut a strip from your cake fabric (and a matching one from your swirl fabric if you're using it) measuring 2 inches tall by roughly a foot long. The length is determined by how thick your fabric is. You can determine this by rolling the fabric (or if using a swirl, roll them together) until it measures 4 inches in diameter (about 1 inch across) at the widest. Fold these in half and sew each along the bottom of the length so that you have a tube (or tubes).


Step 3: If using a swirl, place the swirl fabric on top of the cake fabric with the cake fabric sticking out just a little so that you can tuck it over the swirl fabric and then begin rolling. Then fold (in the picture below, please ignore that my swirl fabric was not quite the height as the cake- it was made from a scrap so I had to make it a bit smaller than normal) If not using the swirl, just start rolling the fabric. You want to be careful and not have the center collapse. As you roll, slowly pull the fabric down a bit.


Step 4: If using swirl fabric, cut a bit off the swirl piece so that it is slightly overlapped by the cake. Pin and sew the end so it's snug against the cupcake. I used a bit of fabric glue to add some extra sturdiness, but you don't have to.


Step 5: Cut off any extra material on the bottom of the cupcake so that it's nice and flat.


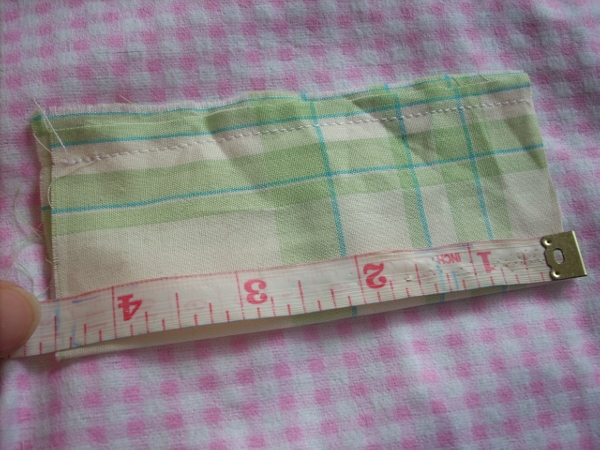
Step 6: Measure your wrapper fabric. It should be 4 inches tall by whatever the diamater of your cupcake is plus 1/2 inch. My cupcake was about 4 inches in diameter, so I measured my wrapper at 4 x 4.5 inches. The extra 1/2 inch is going to be a 1/4 inch seam allowance for each end.


Step 7: Fold the 4 inch length in half and sew the bottom to make a tube as you did with your cake.


Step 8: Now fold the tube in half and sew the pieces together along the 1/4 inch seam allowance. You should have a small tube matching the diameter of your cupcake. Turn it inside out.


Step 9:  With the sewn end at the bottom, slide the wrapper up over the bottom of the cupcake. It should be nice and snug. If it is not, tighten the tube up by sewing it a little more, so that you've made your seam allowance bigger.


Step 10: Now fold the bottom of the cupcake wrapper. It is pretty much how you fold the end of a gift-wrapped package, but I will try to demonstrate. Otherwise have a look at step 4 of this for an example. We are folding it this way because it makes the bottom pretty flat, so that the cupcake can sit upright without falling over. Once folded, pin in place and sew it really well.


Step 11: Decorate!


If you wish to add a handle, they can easily be turned into teacups!


Sunday, May 1, 2011

How To Make A Cloth Rose


Here's a little tutorial on cloth roses. I used a pastel green patterned cotton, but you can use almost anything.


First, get your material. The length of it width-wise will have everything to do with how big and how puffy/gathered your rose is. I have used 21.5 inches for mine, since that's the length of the little square I have and I'm making this for a mini hat.

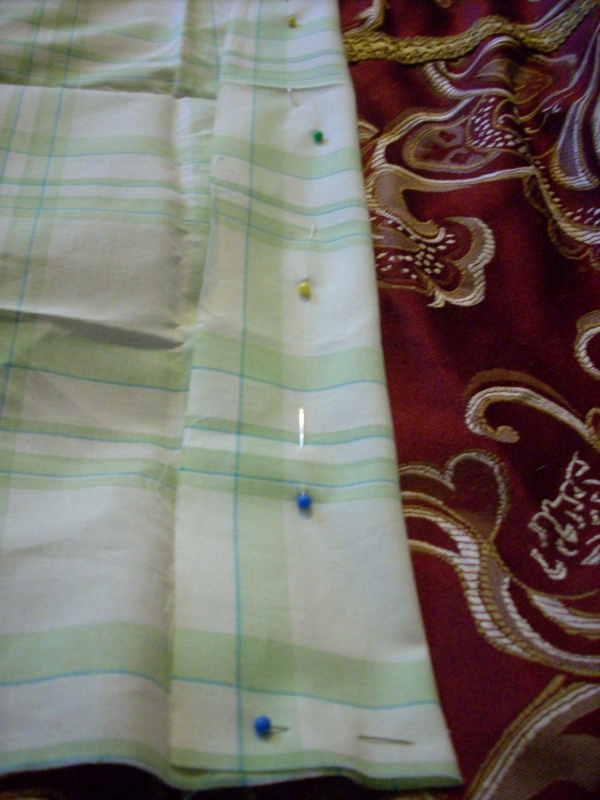
Next, fold it 1.5 inches on one end and 2.5 on the other. Make sure to pin this all along the length to keep a clean edge. If you want you can use fabric chalk to mark the line, but I usually just skip that step and cut along it. The folded fabric should have the underside showing (mine is patterned on both sides, so it doesn't matter) with the front face of the fabric on the inside of the fold.


So you should have a strip of fabric that is folded over, 21.5 inches long and 1.5 wide at one end and 2.5 wide at the other. Basically it tappers from 2.5 to 1.5 inches.


Next we're going to sew the edges All except for the 1.5" edge, leave that open so we can turn this inside out once it's sewn. You have a 1/4" seam allowance and I usually trim it a bit after sewing to make sure there aren't any chunks messing up the way the fabric lays, but that's up to you, and probably won't even be noticeable. I'm just picky. :)

So we should have this now:


Turn it inside-out so the face of your fabric is showing. It should look like this:


Now do a small gathering stitch for the 1.5" end. I usually do this by hand. 

Finally, time to do some serious gathering. I usually try and gather half the fabric, so I went from 21.5" to a 10.5" when finally gathered. For a tutorial on how to do a gather, look here. I only use a typical straight stitch for this, and do it by hand, but again, it's up to you. Do not sew more than one line of thread in. Only use one thread straight across, or the bottom will be too stiff and it will make your rose look weird. Make sure your gathering stitch is running about 1/5" or so away from the edge as you sew (the seam edge, not the folded edge-- that will be the top of the petals).

Fold the gathered 1.5" end and stitch the bottom a few times. After that it's just a matter of tucking and stitching. Roll the fabric and stitch, roll it and stitch. Keep doing so until you get to the end.


Then stitch the bottom a bunch of times so that it's nice and strong. Try to tuck and sew in any little bits into the center to keep it clean. 

And tada! You have a cloth rose!