They are very, very tiny, too.
sweet lolita accessories, hats, headdresses, art, crafts, tutorials, diy, how to, clothing, deco, and more
Showing posts with label flowers. Show all posts
Wednesday, May 4, 2011
Cute Lolita Deco Charm Sets
Posting up a few more sets of deco charms. The largest of these is only about an inch tall. The small items are roughly the size of a pea. See the below post for information on these and how they're made!
Labels:
accessories,
alice in wonderland,
art,
bow,
bows,
bunny,
charms,
deco,
doll,
flowers,
how to,
lolita,
rose,
roses,
sweet lolita
Tuesday, May 3, 2011
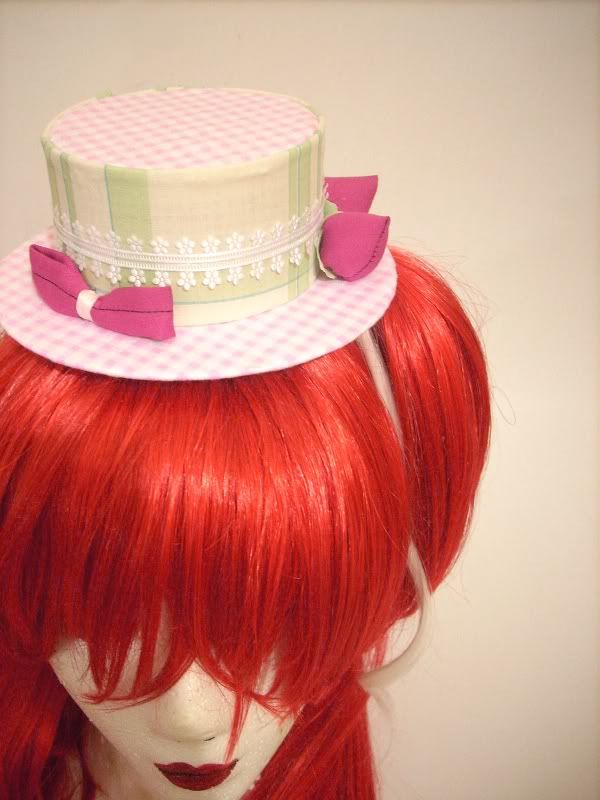
Spring Theme Mini Hat
A little project of mine. I decided to add my recently made strawberries (from the tutorial below) to this adorable little mini hat. I usually list these (and other various goodies) in my shop, if you're interested.
Mini hats, oh boy. They're getting quite popular. I remember years ago that it was only the goths and really old english women who wore them, but now they're all over the place. I'm one for cotton myself, but it seems straw ones are getting out there. What are your thoughts on straw mini hats? Ever made a mini hat? I personally prefer to use plastic canvas rather than felt or cardboard. It is cheap, durable, and very light weight. Cardboard warps over time and felt just seems so tacky to me. Hatting itself can be very addicting and fun to do. The amount of variation possible from just a bit of material is pretty astounding.
As always, comments, thoughts, ideas, and suggestions are welcome. If you make any mini hats I'd love to see some of your work!
Labels:
accessories,
flowers,
lolita,
mini hat,
shop,
strawberry,
sweet lolita
Tutorial on How to Make a Cloth Strawberry
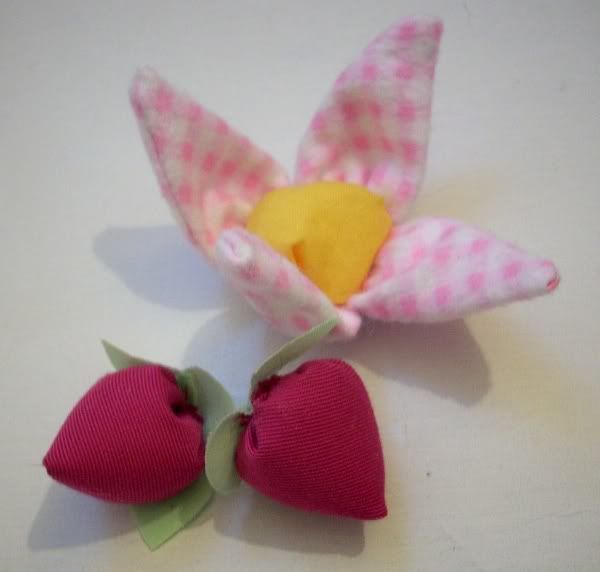
Here's a little tutorial on how to make a cloth strawberry. You can opt to make a flower instead by not stuffing the strawberry and using it as a 'petal'. Four to six petals sewn together make a very adorable flower. My flower has a cotton filled center so that it can be used as a pincushion. I do not suggest making a felt strawberry as felt tends to be a bit too thick. Something thin like cotton (in fact, I always make cotton strawberries) is much better.
On with the tutorial!
Step 2: Fold one of the halves in half, so that you have a quarter of a circle, with the face of the fabric on the inside. Sew along the straight edge, leaving the curved edge open.
Step 3: Turn it inside-out. The face of the fabric should be showing (mine is the same on both sides). Now run a small, relatively tight gathering stitch along the open edge, and do not tie it off as we will do this after stuffing. You will already see your strawberry taking shape!
Step 4: Stuff the strawberry with cotton. You can also use very finely cut up bits of fabric if you don't have any cotton. Just make sure it's well shredded. If you are making the flower, skip this step.
Step 5: Pull the gathering thread tight, this should seal up your strawberry. Stitch it securely so that it doesn't come open.
Optional step 6: Make some leaves to add to the bottom of your strawberry. If you are making the flower, just connect these petals (unstuffed strawberries) together and place something in the middle. I used a little stuffed ball of yellow cotton.
And you're done!
Be sure to leave comments, I'd love to see any ideas and finished projects involving this!
Labels:
art,
cloth flowers,
DIY,
flowers,
how to,
pin cushion,
pincushion,
scraps,
strawberry,
tutorial
Sunday, May 1, 2011
How To Make A Cloth Rose
Here's a little tutorial on cloth roses. I used a pastel green patterned cotton, but you can use almost anything.
First, get your material. The length of it width-wise will have everything to do with how big and how puffy/gathered your rose is. I have used 21.5 inches for mine, since that's the length of the little square I have and I'm making this for a mini hat.
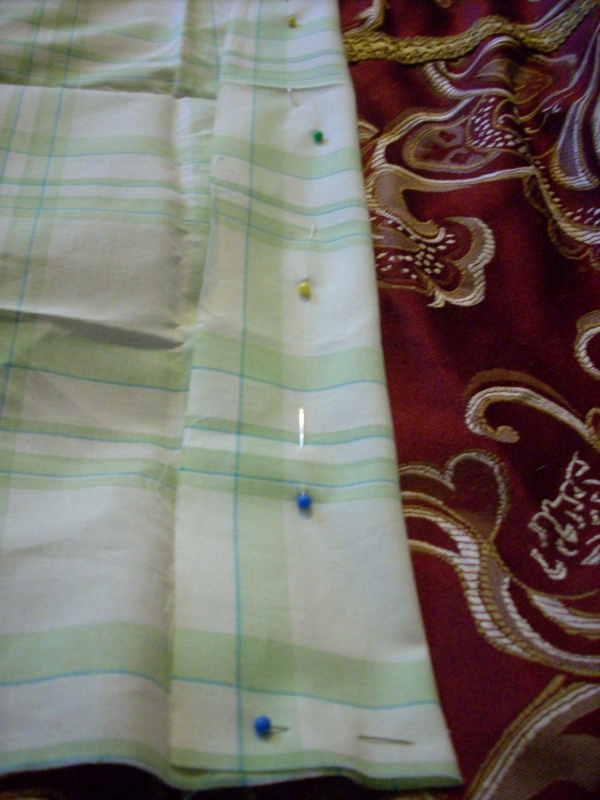
Next, fold it 1.5 inches on one end and 2.5 on the other. Make sure to pin this all along the length to keep a clean edge. If you want you can use fabric chalk to mark the line, but I usually just skip that step and cut along it. The folded fabric should have the underside showing (mine is patterned on both sides, so it doesn't matter) with the front face of the fabric on the inside of the fold.
So you should have a strip of fabric that is folded over, 21.5 inches long and 1.5 wide at one end and 2.5 wide at the other. Basically it tappers from 2.5 to 1.5 inches.
Next we're going to sew the edges All except for the 1.5" edge, leave that open so we can turn this inside out once it's sewn. You have a 1/4" seam allowance and I usually trim it a bit after sewing to make sure there aren't any chunks messing up the way the fabric lays, but that's up to you, and probably won't even be noticeable. I'm just picky. :)
So we should have this now:
Turn it inside-out so the face of your fabric is showing. It should look like this:
Now do a small gathering stitch for the 1.5" end. I usually do this by hand.
Finally, time to do some serious gathering. I usually try and gather half the fabric, so I went from 21.5" to a 10.5" when finally gathered. For a tutorial on how to do a gather, look here. I only use a typical straight stitch for this, and do it by hand, but again, it's up to you. Do not sew more than one line of thread in. Only use one thread straight across, or the bottom will be too stiff and it will make your rose look weird. Make sure your gathering stitch is running about 1/5" or so away from the edge as you sew (the seam edge, not the folded edge-- that will be the top of the petals).
Fold the gathered 1.5" end and stitch the bottom a few times. After that it's just a matter of tucking and stitching. Roll the fabric and stitch, roll it and stitch. Keep doing so until you get to the end.
Then stitch the bottom a bunch of times so that it's nice and strong. Try to tuck and sew in any little bits into the center to keep it clean.
And tada! You have a cloth rose!
Labels:
cloth flowers,
cloth roses,
flowers,
rose,
roses,
tutorial
Saturday, April 30, 2011
Tutorials?
Been thinking of making a tutorial on cloth roses and ribbon roses, maybe bows as well. I know there aren't a whole lot of good ones out there for the crafters, and they're pretty quick and easy to put together.
Speaking of such, here's an example of one which will be used as a centerpiece for a little sweet lolita hat:
I've had a field day with this particular fabric. It's a soft, sweet pink with delicate white vines that have hearts on them. 100% cotton and very good quality.
Speaking of such, here's an example of one which will be used as a centerpiece for a little sweet lolita hat:
I've had a field day with this particular fabric. It's a soft, sweet pink with delicate white vines that have hearts on them. 100% cotton and very good quality.
Labels:
bows,
cloth flowers,
cloth roses,
flowers,
lolita,
ribbons,
roses,
sweet lolita,
tutorial
Subscribe to:
Posts (Atom)