My Links

Showing posts with label lolita. Show all posts

Thursday, December 1, 2011

How To Make A Snow Globe


Pretty much anything around the house that is clear and can be sealed is able to be a snow globe. Mason jars are a common option, but I personally like to reuse salt and pepper (or other spice) shakers. Depending on the size of your globe, these can be used for just about anything, including christmas presents. Small ones can even be used as ornaments; just attach a ribbon or sturdy string to the top in a hoop.

My own globes will be listed for sale on my website.

Salt Shaker Snow Globe
What you will need:

  • a salt shaker with the lid
  • cotton stuffing
  • something to put inside (I used a doll charm I made out of poly clay)
  • glitter
  • a hot glue gun and glue sticks
  • decorations (ribbon, cloth to cover the lid, etc)
Step 1.  Carefully squeeze a generous amount of glue into the shaker. Make sure it only touches the bottom. Drop a chunk of cotton in and use a stick or pencil to stuff it down. If the stick gets stuck, carefully use another one to pry the material off before pulling it out. Let dry.

Step 2.  Add more glue on top of the cotton, then add your charm. Using tweezers can help you to position it. Let dry.

Step 3.  Fill with water, then add a decent amount of glitter.

Step 4.  Squeeze a good amount of glue into the inside of your shaker cap, making sure it fills the little holes. Then coat the insides of the shaker with glue and quickly screw or press it firmly onto the top of the shaker. Let dry.

Step 5.  Turn the shaker upside-down to check if water leaks. If it does, fill the leaking spots with glue to seal it.

Step 6.  Decorate your globe as you wish!


Tuesday, November 29, 2011

Monochrome EGA mini hat


Yet another one of my mini hats. This is a black and white EGA mini top hat, made of cotton with a plastic canvas base. The ribbon used it a fine grossgrain, though it looks a bit like satin. The tiny all black bows are just typical thin grossgrain ribbon. On the bottom of the hat there is smooth black velvet with an attached comb to secure it to your hair. I would personally wear this hat, since I love that classy, victorian gothic look. I think it is pretty gender-neutral as well, which spices up the collection. It's a fairly simple hat, but I believe it speaks of elegance.

I will be listing it with all of my other hats on my website. I've been revamping my website as well as my blogs over the last couple of days, so things should get more active. However, it will probably be a bit chaotic until it's all settled and cleaned up. I've got quite a lot of hats I plan to list, as well as a stuffed animal (I am debating making more of these) and some bows. I've also been thinking of making bloomers/breaches, but that will have to wait until I have enough material. Unfortunately I am broke.

Ah, which reminds me, if anyone wishes to donate to my artist endeavors (donations will be used to purchase supplies) you may do so using paypal. :)
Any and all donations are greatly appreciated.


I have been considering making a DIY/tutorial on how to make a mini hat using my own techniques. I know there are some out there, but most seem to be a bit on the less-than-professional side. I have been making these for quite a few years, so maybe I can contribute something useful. Once I have some down-time I'll see to pumping one out. Pretty soon here there will be a list of tutorials I've made available for easy access on the blog, so please bare with me while I put things together. It's quite untidy. 

Cupcake Hat


Here's my finished cupcake hat. I'm pretty happy with it. This is a remake of an older design and I think it came out quite well, though it certainly took a while. The entire piece is hand-made. The base is made of plastic canvas and overlaid with soft pink cotton decorated in little white hearts. a ring of lace and organza accentuates this, and little pearly pink candy beads circle the cupcake. The cupcake itself is made of polymore which was hand formed, hand painted, and then lightly glazed. I also made the heart candy at the top of this, which is likewise topped with a pearl.

It's a very intricate and delicate looking hat, but surprisingly sturdy. I manhandled it quite a bit as I made it. The bottom of the hat is fixed with a smooth surface of the pink/white heart cotton, and a strong black comb is secured to it so you can seamlessly slip it into your hair and go.

I don't normally make hats like this as they tend to be the hardest for me, but they're also satisfying. My design is completely made by me, so it is guaranteed one of a kind, which is a nice feeling. I will be putting this up on my website for sale. It is made of the same material as my teacup hat.

I've also been working on some of my other hat designs and getting things in order to list quite a few other items-- specifically, I'm working on a bonnet design. It's a busy time of the year, so posts may be a bit sporadic.

Wednesday, November 23, 2011

A Unique Plant Holder

This is probably my best invention yet, and there really isn't much to it. I've had vintage teacups laying about and so Ii wanted to do something with them. I use clippings from plants around the house. I have also used large seashells to hold plants, and they make wonderful gifts.


Friday, May 6, 2011

Jo-Ann Fabrics and Cotton Lace Woes

It's probably clear by now that most of the time I'm building sweet lolita items, but I also cover EGL, Steam Punk, victorian gothic (generally men's attire) and cosplay. Yesterday I went to my beloved Jo-Ann Fabrics on a quest for some good, quality foam for the Neon Genesis Evangelion suit I am custom making my fiance. Since I am on a budget I had to lecture myself to not buy anything else.

But I failed terribly and ended up buying some lovely, fine grossgrain white ribbon and a nice black, white, and subtly smoky purple flower pattern cotton.


If only they had decent lace. One thing I have noticed about my favorite arts and crafts store is that they never have decent lace. Ever. It is always scratchy nylon or cheap polyester. They have rows and rows of the stuff, and it's such a shame. I saw a heart pattern that was beautiful, but the lace was terribly scratchy.

The quality of lace can easily make or break a lolita outfit, no matter how lovely that outfit is otherwise. The problem is that most craft stores have no clue at all. So where do we go to get our fine lace? As for me, I go to ebay. It's a risky business I don't recommend unless you've already got specific sellers you use who's stuff you know is good. I generally order from a nice older woman who handcrafts all her lace, and it is the softest, most beautiful lace I've ever purchased. But you don't need to go to ebay for it. Check out some local bridal shops and you might find yourself surprised that they often sell gorgeous, quality lace.

If you want to buy lace online, however, here are a few highly suggested shops:
http://cheeptrims.com/
http://www.etsy.com/shop/MaryNotMartha
http://www.doveoriginalstrims.com/ (only has a few good quality, so be careful)
http://www.dharmatrading.com/
http://kuboriki.com/en/ (gorgeous section of tulle lace)
http://lolitaer.taobao.com/ (chinese)
http://www.laceheaven.com/
http://delicatestitches.com/ (check out their cluney lace, very nice)


Links credited to: http://www.fyeahlolita.com/, http://egl.livejournal.com/

Wednesday, May 4, 2011

Cute Lolita Deco Charm Sets

Posting up a few more sets of deco charms. The largest of these is only about an inch tall. The small items are roughly the size of a pea. See the below post for information on these and how they're made!


They are very, very tiny, too.


Deco Charms


Someone recently asked me about deco and I was reminded of the bag of charms/deco I've made that's been laying around. So I thought I'd take a few pictures. This set is my 'Alice in Wonderland' set and includes variations of the white rabbit, Alice's blue bow, a mini mad hatter hat (complete with a tiny sash and card) and a carrot for the bunny because, you know, bunnies love carrots.

These are made with poly clay, and are really quite easy. If you're interested in making deco you can get some clay for fairly cheap at most arts and crafts stores (Joanne Fabrics is my all time favorite). It comes in different colors, but I prefer to get white and then just paint it as the natural color of the clay can be altered when baked. The particular charms I made are -very- small. The hat itself is only an inch tall.

Tip: If you want your deco/charms to have a polished and 'glossy' look without getting expensive, apply some clear nail polish over them. Let that coat sit, then once it's totally dry, apply another coat. It works very well and is a cheap alternative to gloss paints out there. :)

Tuesday, May 3, 2011

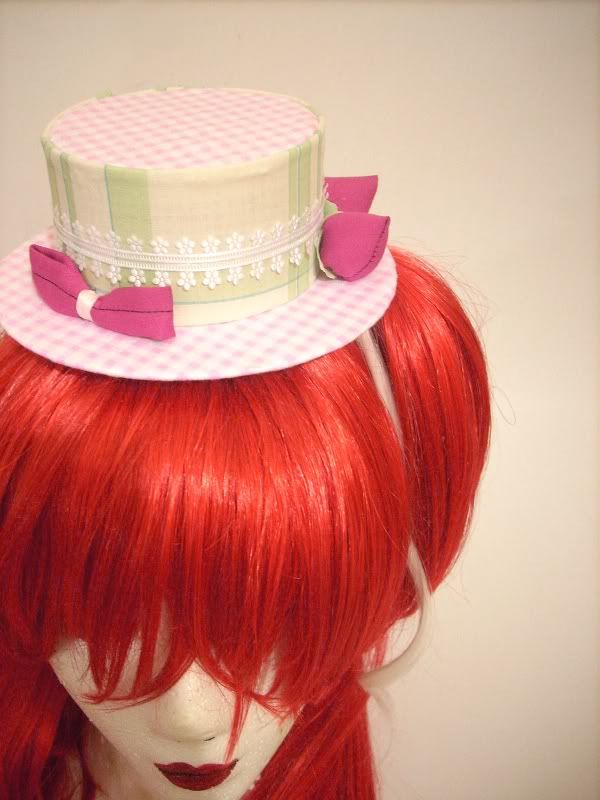
Spring Theme Mini Hat


A little project of mine. I decided to add my recently made strawberries (from the tutorial below) to this adorable little mini hat. I usually list these (and other various goodies) in my shop, if you're interested.

Mini hats, oh boy. They're getting quite popular. I remember years ago that it was only the goths and really old english women who wore them, but now they're all over the place. I'm one for cotton myself, but it seems straw ones are getting out there. What are your thoughts on straw mini hats? Ever made a mini hat? I personally prefer to use plastic canvas rather than felt or cardboard. It is cheap, durable, and very light weight. Cardboard warps over time and felt just seems so tacky to me. Hatting itself can be very addicting and fun to do. The amount of variation possible from just a bit of material is pretty astounding.

As always, comments, thoughts, ideas, and suggestions are welcome. If you make any mini hats I'd love to see some of your work!

Monday, May 2, 2011

Cupcake / Teacup Pincushion Tutorial


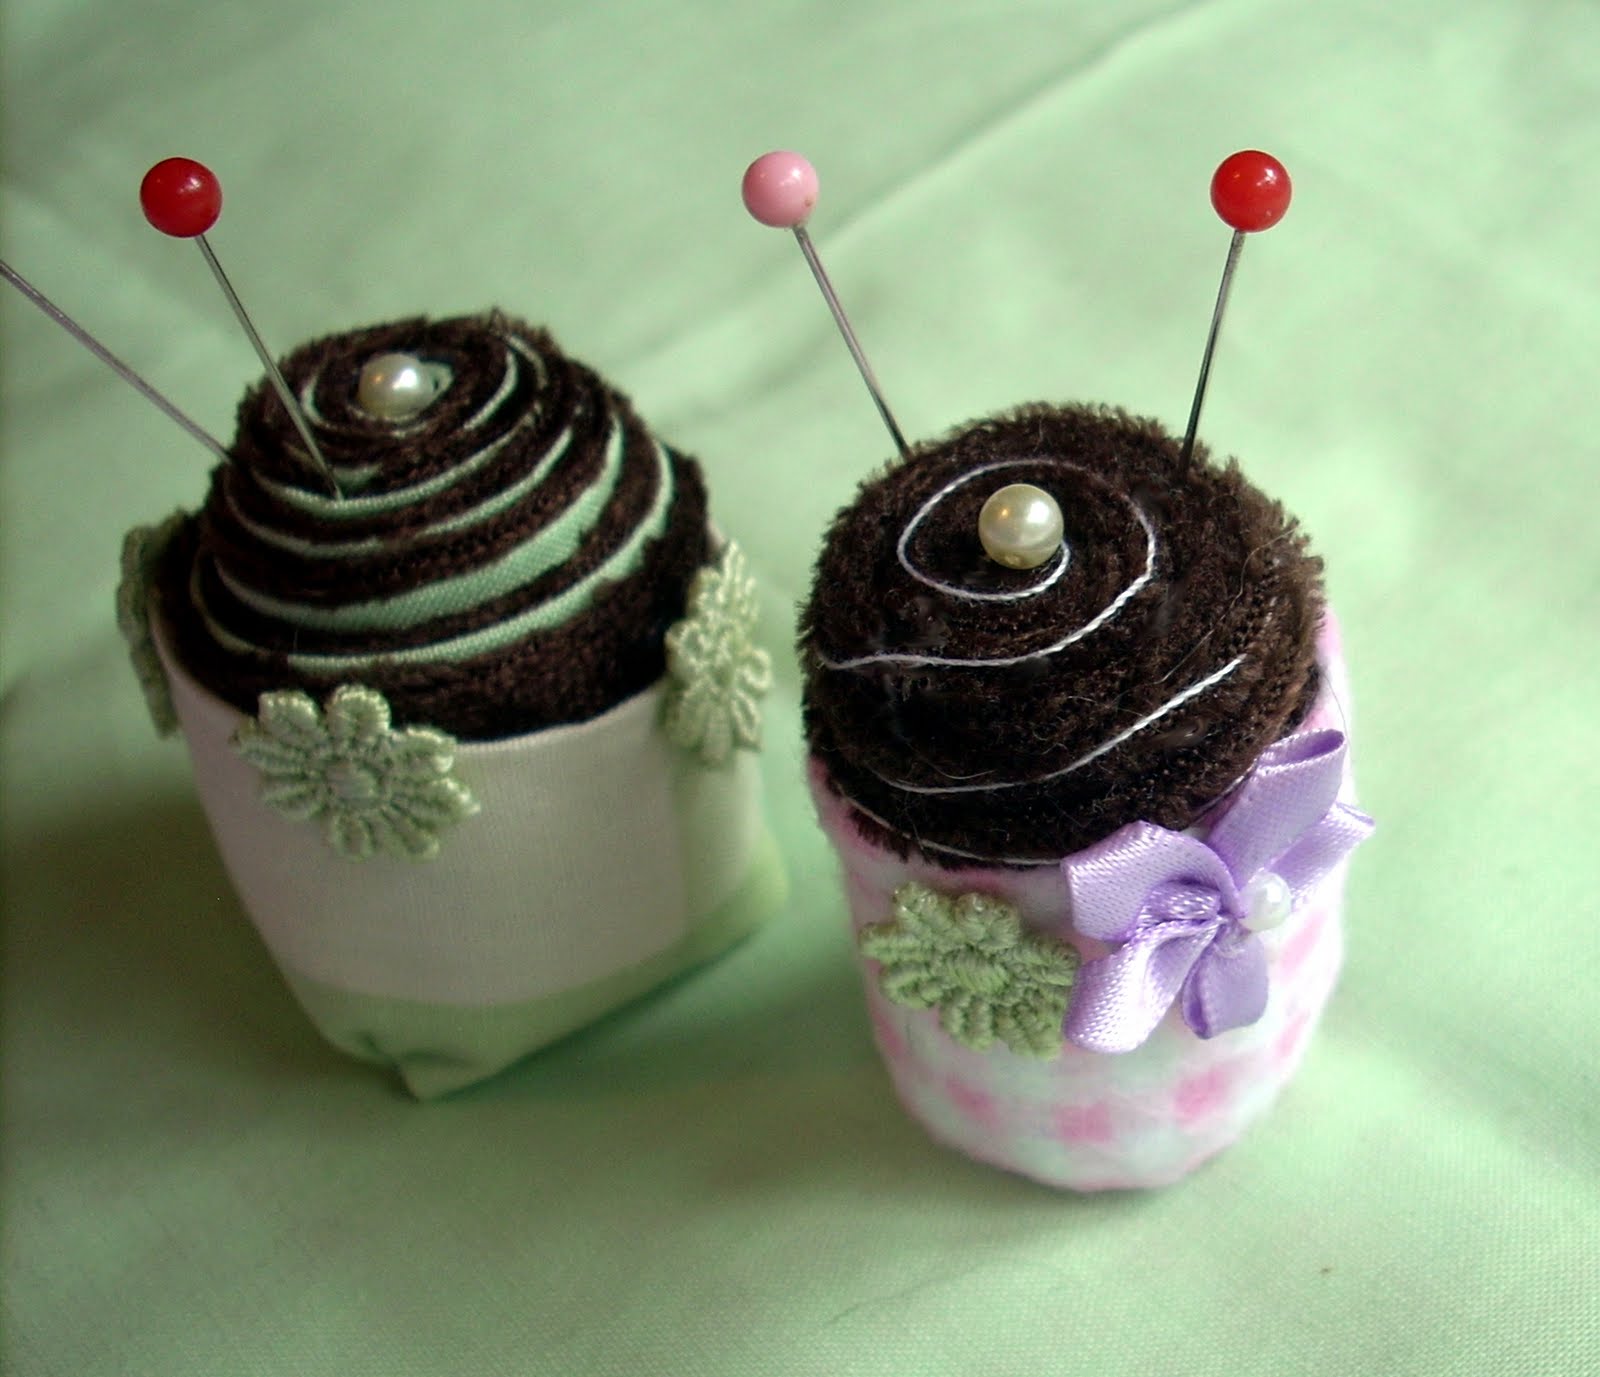
Thought I'd make a tutorial on how to make adorable cupcake pincushions. These are roughly 1.5 to 2 inches tall and about an inch across, or 4 inches in diameter. They are very easy, not at all time consuming, and take very little material. I made my own from scraps.
These little cupcakes make great gifts, especially passed out at Lolita meet-ups!

Step 1: Choose your material. You will need at least two; one for your cake and one for your cupcake wrapper. The one for your cake must be plush, or you will end up using a good amount of material. I am using some leftover brown velvet for my 'chocolate'. It is perfectly plush. You can probably get away with a thick cotton, but velvet, felt, or even wool would be better. Make sure it is something that can handle a whole lot of needles without being ruined. The second fabric (for the wrapper) must be something more thin, such as basic cotton, which is what I've used.
** You can also opt for a third color if you wish to make a swirly cupcake. I have used a mint-green cotton for this in my tutorial.


Step 2:  Cut a strip from your cake fabric (and a matching one from your swirl fabric if you're using it) measuring 2 inches tall by roughly a foot long. The length is determined by how thick your fabric is. You can determine this by rolling the fabric (or if using a swirl, roll them together) until it measures 4 inches in diameter (about 1 inch across) at the widest. Fold these in half and sew each along the bottom of the length so that you have a tube (or tubes).


Step 3: If using a swirl, place the swirl fabric on top of the cake fabric with the cake fabric sticking out just a little so that you can tuck it over the swirl fabric and then begin rolling. Then fold (in the picture below, please ignore that my swirl fabric was not quite the height as the cake- it was made from a scrap so I had to make it a bit smaller than normal) If not using the swirl, just start rolling the fabric. You want to be careful and not have the center collapse. As you roll, slowly pull the fabric down a bit.


Step 4: If using swirl fabric, cut a bit off the swirl piece so that it is slightly overlapped by the cake. Pin and sew the end so it's snug against the cupcake. I used a bit of fabric glue to add some extra sturdiness, but you don't have to.


Step 5: Cut off any extra material on the bottom of the cupcake so that it's nice and flat.


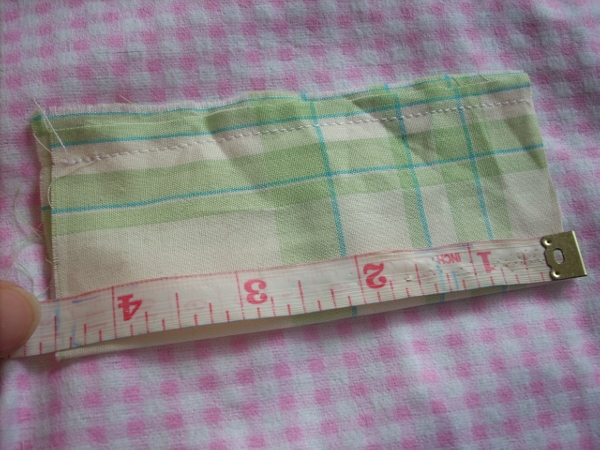
Step 6: Measure your wrapper fabric. It should be 4 inches tall by whatever the diamater of your cupcake is plus 1/2 inch. My cupcake was about 4 inches in diameter, so I measured my wrapper at 4 x 4.5 inches. The extra 1/2 inch is going to be a 1/4 inch seam allowance for each end.


Step 7: Fold the 4 inch length in half and sew the bottom to make a tube as you did with your cake.


Step 8: Now fold the tube in half and sew the pieces together along the 1/4 inch seam allowance. You should have a small tube matching the diameter of your cupcake. Turn it inside out.


Step 9:  With the sewn end at the bottom, slide the wrapper up over the bottom of the cupcake. It should be nice and snug. If it is not, tighten the tube up by sewing it a little more, so that you've made your seam allowance bigger.


Step 10: Now fold the bottom of the cupcake wrapper. It is pretty much how you fold the end of a gift-wrapped package, but I will try to demonstrate. Otherwise have a look at step 4 of this for an example. We are folding it this way because it makes the bottom pretty flat, so that the cupcake can sit upright without falling over. Once folded, pin in place and sew it really well.


Step 11: Decorate!


If you wish to add a handle, they can easily be turned into teacups!


Sunday, May 1, 2011

Plastic Canvas for Hats and More

I've been asked a few times what I use as the framework of my hats and boxes. It is called 'plastic canvas' and looks like this:


As you can see, it cuts pretty cleanly and it is very flexible, but firm. Because it has those little squares it is best to do an underlayer of a material (usually I use white if I'm layering that with something light, and black if with something dark) so that it is not going to be seen through the top material. This also ensures that there aren't any pointy or ragged edges. You can buy it in sheets or circles (usually I use the circles for mini hat brims and tops) at fabric stores like Joanne Fabrics.

Examples of things made with plastic canvas:


Sweet Lolita Rose Bow

Originally planned to be made for a mini hat, but I was suddenly spurred to make a bow instead using the pink cotton rose with a matching bow. Adorable, isn't it? The lace is one of my favorites. It's handmade by an elderly woman who has crafted lace for a long time, and the quality is incomparable. It doesn't fray at all. It is sturdy, but baby-soft and the pink ribbon embedded is gorgeous. It is a satin ribbon and I normally prefer grosgrain, yet this one is of such nice quality with seamed edges that I'd be a fool to not use it.


Saturday, April 30, 2011

Tutorials?

Been thinking of making a tutorial on cloth roses and ribbon roses, maybe bows as well. I know there aren't a whole lot of good ones out there for the crafters, and they're pretty quick and easy to put together.

Speaking of such, here's an example of one which will be used as a centerpiece for a little sweet lolita hat:


I've had a field day with this particular fabric. It's a soft, sweet pink with delicate white vines that have hearts on them. 100% cotton and very good quality.

Friday, April 29, 2011

Sweet Lolita Pink Teacup Mini Hat

The newest of the goods!


Fitting for a lolita wonderland, this gorgeous, entirely handcrafted teacup mini hat is one of a kind. Pink cotten material with tiny white heart patterns sets off plush lavender flowers and pale pearl beads, and the lace around the rim is handmade from cotton inset with a pink satin ribbon. The 'tea' is a soft, light velvet, adding a hint of sheen. 
With a specially designed light plastic base made for hat crafting, it is durable and unlikely to break. The curled, slightly puffed handle has a wire setting and the hat is worn with a transparent, wide comb beneath that allows for comfort, stability, and modesty.


This can be purchased here!