Here's a little tutorial on how to make a cloth strawberry. You can opt to make a flower instead by not stuffing the strawberry and using it as a 'petal'. Four to six petals sewn together make a very adorable flower. My flower has a cotton filled center so that it can be used as a pincushion. I do not suggest making a felt strawberry as felt tends to be a bit too thick. Something thin like cotton (in fact, I always make cotton strawberries) is much better.
On with the tutorial!


Step 2: Fold one of the halves in half, so that you have a quarter of a circle, with the face of the fabric on the inside. Sew along the straight edge, leaving the curved edge open.


Step 3: Turn it inside-out. The face of the fabric should be showing (mine is the same on both sides). Now run a small, relatively tight gathering stitch along the open edge, and do not tie it off as we will do this after stuffing. You will already see your strawberry taking shape!

Step 4: Stuff the strawberry with cotton. You can also use very finely cut up bits of fabric if you don't have any cotton. Just make sure it's well shredded. If you are making the flower, skip this step.


Step 5: Pull the gathering thread tight, this should seal up your strawberry. Stitch it securely so that it doesn't come open.


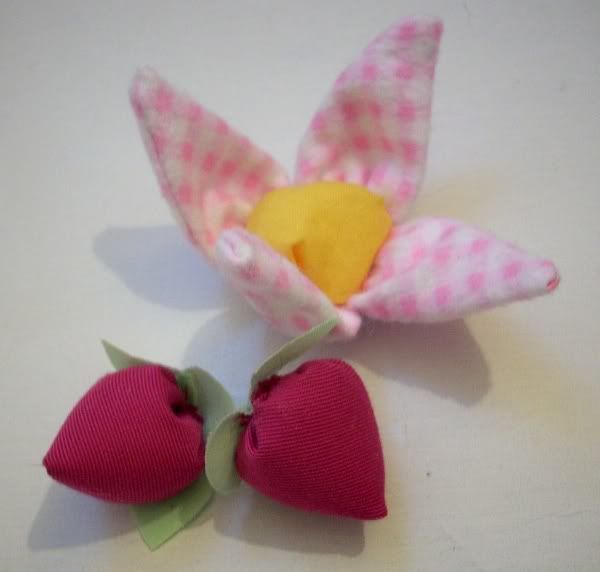
Optional step 6: Make some leaves to add to the bottom of your strawberry. If you are making the flower, just connect these petals (unstuffed strawberries) together and place something in the middle. I used a little stuffed ball of yellow cotton.
And you're done!
Be sure to leave comments, I'd love to see any ideas and finished projects involving this!
No comments:
Post a Comment